'%3e%3cpath%20d='M24.5464%2012.669C24.5464%206.00112%2019.1739%200.595703%2012.5464%200.595703C5.91897%200.595703%200.546387%206.00112%200.546387%2012.669C0.546387%2018.6951%204.93459%2023.6899%2010.6714%2024.5957V16.159H7.62452V12.669H10.6714V10.0091C10.6714%206.98325%2012.463%205.31185%2015.2039%205.31185C16.5169%205.31185%2017.8901%205.54766%2017.8901%205.54766V8.51884H16.377C14.8864%208.51884%2014.4214%209.44957%2014.4214%2010.4044V12.669H17.7495L17.2175%2016.159H14.4214V24.5957C20.1582%2023.6899%2024.5464%2018.6953%2024.5464%2012.669Z'%20fill='%23FBFBFB'/%3e%3c/g%3e%3cdefs%3e%3cclipPath%20id='clip0_2425_6619'%3e%3crect%20width='24'%20height='24'%20fill='white'%20transform='translate(0.546387%200.595703)'/%3e%3c/clipPath%3e%3c/defs%3e%3c/svg%3e)


Diy Planters for Your Mini Home Garden
March 6, 2022
Flowers and plants have always been a part of our lives, whether we enjoy receiving them or having them in our homes. What do you do when your plant needs extra space to flourish or when standard planters are insufficient for your particular style? My advice is to create your own DIY planters. Alternatively, you may recycle some other pots or planters you have lying around.
1. Recycled Plastic Planters

Can planters are a unique and inexpensive way to decorate your home, but what about upside-down can planters? You probably never imagined plants growing upside down, but it is not only conceivable but also rather attractive.
To complete this project on your own, a coffee can with a plastic lid would be ideal. After you've drilled the drainage holes, flip the can over and fill it with dirt before adding your plant.
The challenging part now is preventing the dirt from overflowing with the plant. Cut out the circular after tracing the bottom of the can on a coffee filter or landscape cloth. You should also make a hole the size of your plant's main stem.
Then, poke a hole in the plastic cover, screw it on, and flip the planter over. You now have a tremendous recycled upside-down planter to use as a decoration in your house.
2. Coffee Bag Planters

Coffee bags should be cut in half lengthwise. You can cut it into thirds to produce smaller seedling pots.
Make a sleeve by stitching along the edge.
To make longer pots for plants with deeper roots, cut the sleeve in thirds or a longer, bespoke length.
Stitch the bag's base shut to make a sealed pouch.
Roll the bag's top over to provide a grasp point. Fill the bag with dirt and pot it like a plant!
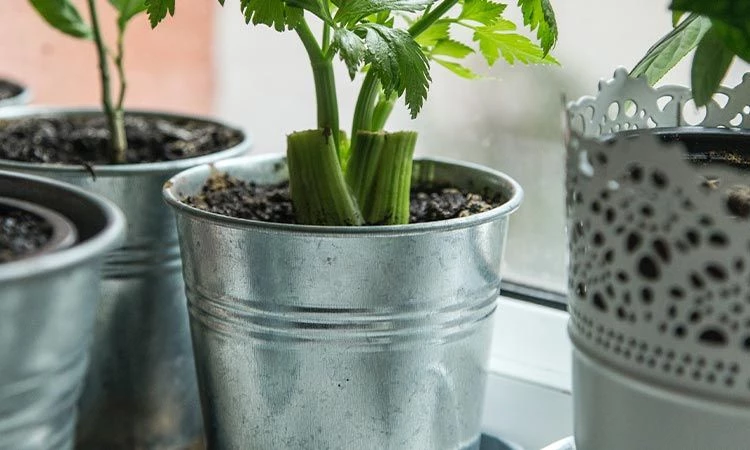
3. DIY Paint Can Planters

If you're recycling your cans, remove the labels and scrape away any drips from the edges. Spray the cans with the first color of spray paint. Allow for complete drying, which should take at least 5 hours.
Use painter's tape to create your desired design. Allow the second color of spray paint to dry completely. When the paint is dry, carefully remove the painter's tape.
Make drainage holes in the bottom of your paint can using a hammer and a nail. To avoid damaging your paint, place a soft cloth or towel below your container.
Fill the bottom of the planter with gravel, then fill it with potting soil with your favorite blossoms.
4. Mason Jar Planters

Spray paint each jar the desired color while it is flipped over with the mouth down. The initial layer should be a very light application that does not cover completely. After the first application has dried for 10 minutes, you can apply a second coat. Repeat until you get the desired coverage.
We can transplant our spring plants once they have dried for 24 hours. Make a paper funnel and insert it in the jar's mouth. Scoop in the potting dirt gradually.
Fill little more than two-thirds of the way, giving plenty of room for your plant.
Separate your flowers into smaller natural groups. Place your flowers in the container and fill the jar with any additional dirt accumulated around the plant.
Gardening is one way to reduce stress, having your own mini garden at home can be a huge help in gathering your peace. These days our wellness should always be a priority. One of the well known amenities of The Sofia Terraces is the landscape garden, perfect for plantitos and plantitas like you! To know more about this project, click the link below. https://suntrust.com.ph/condominium/baguio-condominium-properties/sofia-...
Share this article